
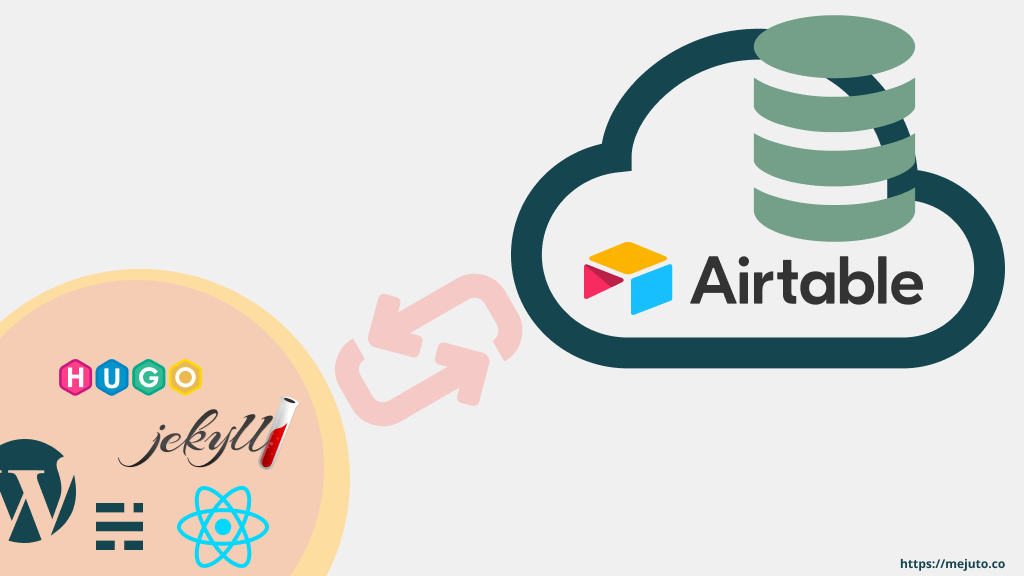
Easily creating a backend for static sites with Airtable
Video screencast: step by step
Airtable is great. You get a table in the cloud1, very easy to setup, and with many integrations.
I have been playing with one of its features, a RESTful api created from your base — Airtable calls bases tables. Airtable automatically generates example calls and CRUD2 commands.
Here we can see one of the examples autogenerated.
# Example request

# the real base id has been replaced by YOUR_BASE_ID here
curl "https://api.airtable.com/v0/YOUR_BASE_ID/email_subscribers\
  ?maxRecords=3&view=Grid%20view" \
  -H "Authorization: Bearer YOUR_API_KEY"

Example response

{
    "records": [
        {
            "id": "recEMja01ECRf0HVr",
            "fields": {
                "email": "j@mejuto.co",
                "Notes": "myself\n",
                "Created": "2021-01-14T15:08:32.000Z"
            },
            "createdTime": "2021-01-14T15:08:32.000Z"
        },
        {
            "id": "recmpTXG8tJRFZqxJ",
            "fields": {
                "email": "hello@example.com",
                "Created": "2021-02-01T14:16:38.000Z"
            },
            "createdTime": "2021-02-01T14:16:38.000Z"
        }
    ],
    "offset": "recmpTXG8tJRFZqxJ"
}
Generated rest api with curl commands, endpoints, and responses
As soon as I tried this, I thought it was very powerful 3.
-
Can we use Airtables RESTful api as a backend, with only frontend? If this is viable, we could develop our site in React — for instance — and directly call any apis in Airtable. This would be a very quick way to build prototypes and MVPs4.
-
Can we use rest api to add behaviour to a static site generator? Like jekyll
The mission
To test this I created a Subscribe-to-newsletter box that uses Airtable as a back-end.
- It will use only
html,javascriptandcss(scsscompiled tocss) - We are adding it to a
Jekyllblog — this one, where this article was written. The same code should work in any other SSG 5 —hugo,ghost, etc. — or platform — plain website,Wordpress. Anywhere that can serve html.

These are the results we are looking for
We will jump between the backend and the frontend to end up with the component above. Let’s start with the backend. It will be Airtable.
Subscribe to newsletter: the backend
Creating a new base
We can create a new table — or a base, as Airtable calls it — to store our beloved email subscribers. I called it email_subscribers
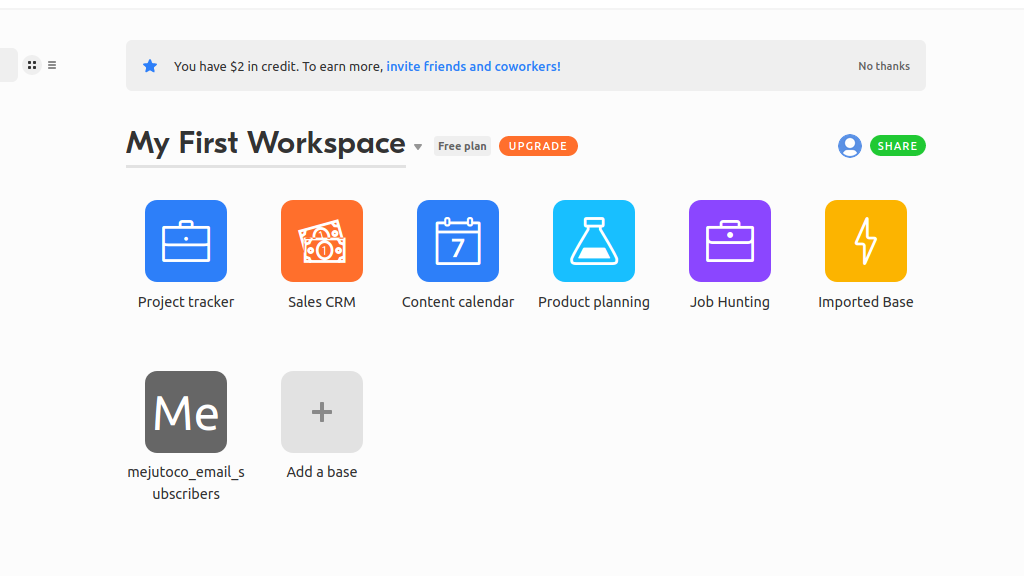
A new base, or table, for our data
Adding columns and its types
We will add the minimum information for an email subscriber
email: Obviously we need to store thisCreated: A type of column that Airtable populates for us with the time the record was createdNotes: This field is not strictly necessary, but we might want it to store extra information. In this case I commented on the fact that the first email is me, and not a subscriber.
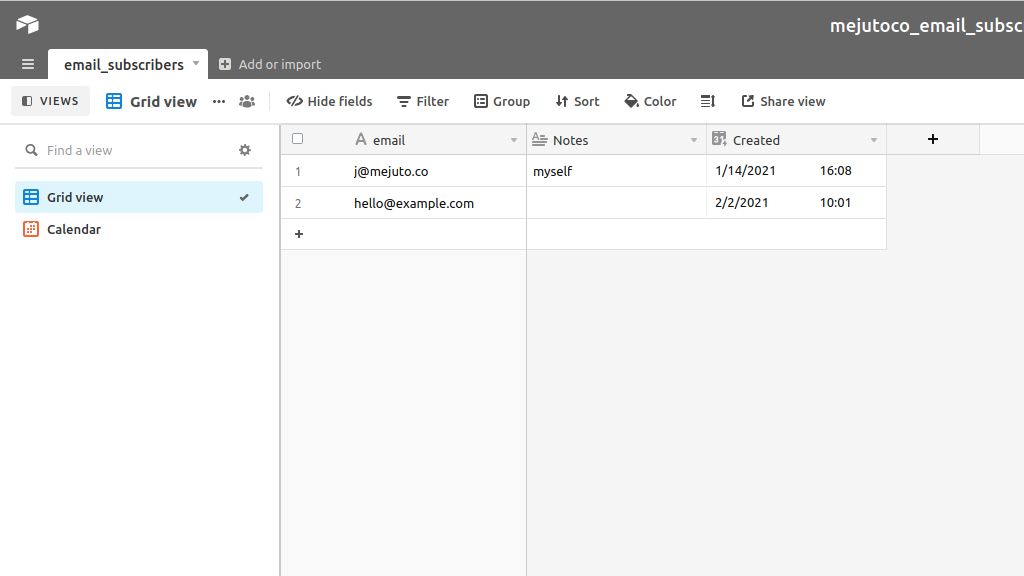
The basic information we need for an email subscriber
Next, we generate a rest api from the base email_subscribers we just created.
We go to https://airtable.com/api select the base
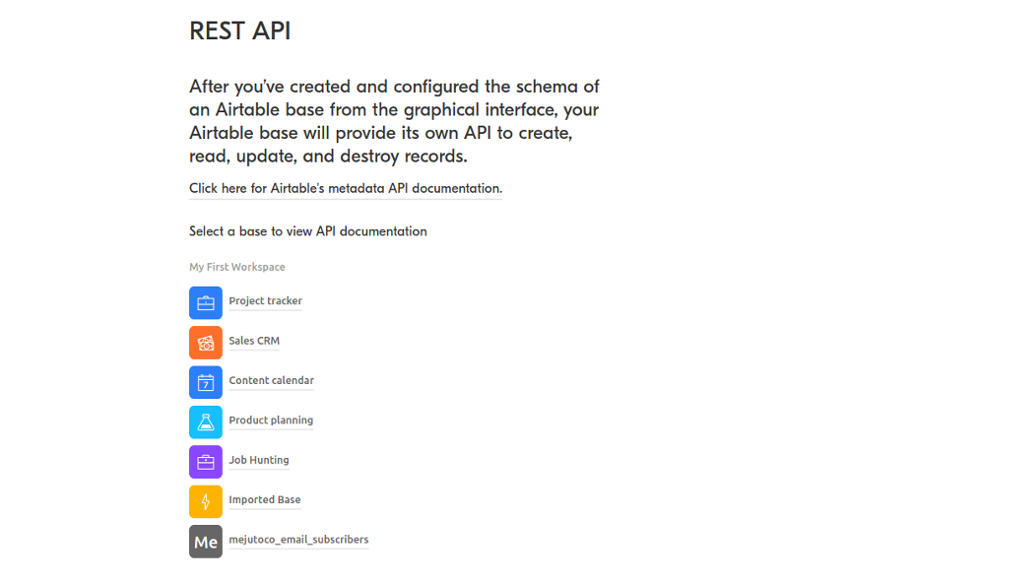
Just select an existing base to generate an api.
And here is our api:

The autogenerated api docs
As you can see in the generated api, we will need to use
base id, included in the api already.api key
How to get the base id
- We need to replace the values in
airtable_base = 'YOUR_BASE_ID'with our base’s id. You can find it in the url of the generatd rest api, or in any of the example calls:
https://airtable.com/YOUR_BASE_ID/api/docs#curl/table:email_subscribers:create
How to get our api key
You can get the api key in https://airtable.com/account

Clicking on the asterisks shows the key
Subscribe to newsletter: the frontend
a simple — but insecure — implementation
<!--
    if using jekyll, indents wrap html into pre tag
    so dont indent html
-->
<script type="text/javascript" src="/assets/js/jquery-3.5.0.min.js"></script>

<div class="subscribe-to-newsletter">
<div class="top">
<h3 class="title">Receive new articles in your inbox</h3>
<h4 class="subtitle">Never more than once a week</h4>
</div>
<div class="bottom">
<div class="before">
<div class="input">
<input type="email" placeholder="name@domain.com" value=""/>
</div>
<div class="button">
<button>Subscribe</button>
</div>
<div class="disclaimer">
<small>I will not share your email with third-parties</small>
</div>
</div>
<div class="after hidden">
<div class="input-cont">
<p class="input">Thank you for subscribing!</p>
</div>
</div>
</div>
</div>

<script type="text/javascript">
    $(document).ready(function () {
        console.log("airtable");
        $('.subscribe-to-newsletter button').bind('click', function () {
            const cont = $(this).closest('.subscribe-to-newsletter');
            const emailVal = $(cont).find('.input input').val();
            console.log("click", emailVal);

            if (emailVal.indexOf('@') !== -1) {
                const data = {fields: {email: emailVal}, typecast: true};
                $.ajax({
                    // email subscribers is the table's name
                    url: 'https://api.airtable.com/v0/BASE_ID/email_subscribers',
                    type: 'post',
                    data: JSON.stringify(data),
                    // api key
                    headers: {
                        "Authorization": 'Bearer MY_API_KEY',
                        "Content-Type": 'application/json'
                    },
                    dataType: 'json',
                    success: function (data) {
                        console.info(data);
                        $(cont).find('.before').addClass('hidden');
                        $(cont).find('.after').removeClass('hidden');
                    }
                });
            }
        });
    });
</script>
Html and javascript in subscribe_to_newsletter.html
We can include it in any page or post.
{% include subscribe_to_newsletter.html %}
In jekyll, one line to include in our posts or pages
.subscribe-to-newsletter {
  width: 100%;
  height: 283px;
  background: #F5CDB4;
  padding: 25px;

  display: grid;
  /*@formatter:off*/
  grid: 'top'
        'bottom';
  /*@formatter:on*/
  grid-template-rows: 1fr;
  grid-template-columns: 1fr;
  grid-gap: 0;

  h3, h4 {
    padding: 0;
    margin: 0;
  }

  .top {
    grid-area: top;

    display: grid;
    /*@formatter:off*/
    grid: 'title .'
          'subtitle .';
    /*@formatter:on*/
    grid-template-rows: minmax(min-content, 124px);
    grid-template-columns: minmax(min-content, 488px);

    .title {
      grid-area: title;
      font-family: Roboto;
      font-style: normal;
      font-weight: bold;
      font-size: 52px;
      line-height: 61px;

      color: #74A089;
    }

    .subtitle {
      grid-area: subtitle;
      font-family: Open Sans;
      font-style: normal;
      font-weight: normal;
      font-size: 14px;
      line-height: 19px;

      /* identical to box height */

      color: #15454E;
    }
  }

  .bottom {
    grid-area: bottom;

    .before, .after {
      display: grid;
      /*@formatter:off*/
      grid: '. input subscribe'
          '. disclaimer disclaimer';
      /*@formatter:on*/
      grid-template-rows: minmax(min-content, 45px) 1fr;
      grid-template-columns: 1fr 236px 140px;
    }

    .before {
      .input {
        grid-area: input;

        input {
          font-family: Open Sans;
          font-style: normal;
          font-weight: normal;
          font-size: 16px;
          line-height: 22px;

          color: #425466;
          padding: 0.8rem;
          background-color: #FFFFFF;
          border: 1px solid #425466;
          box-sizing: border-box;
          border-radius: 5px;
        }
      }

      .button {
        grid-area: subscribe;

        button {
          margin-left: 14px;
          background-color: #15454E;
          mix-blend-mode: normal;
          border-radius: 15px;
          padding: 0.8rem;
          font-family: Open Sans;
          font-style: normal;
          font-weight: bold;
          font-size: 18px;
          line-height: 25px;
          text-align: center;

          color: #FFFFFF;
          // animation on hover
          -webkit-transition: background-color 500ms ease;
          -ms-transition: background-color 500ms ease;
          transition: background-color 500ms ease;
        }

        button:hover {
          background-color: #74A089;
        }
      }

      .disclaimer {
        grid-area: disclaimer;

        small {
          font-family: Open Sans;
          font-style: normal;
          font-weight: normal;
          font-size: 14px;
          line-height: 19px;

          /* identical to box height */

          color: #425466;
        }
      }
    }

    .after {
      .input-cont {
        grid-area: input;

        .input {
          font-family: Open Sans;
          font-style: normal;
          font-weight: bold;
          font-size: 26px;
          line-height: 35px;

          color: #15454E;
        }
      }
    }
  }

  .before.hidden,
  .after.hidden {
    display: none;
  }
}
Styling in file style.scss
Or If you prefer you can get the plain css version
Why this is a bad idea
Some resources stop here. Job done! But this is a terrible idea in terms of security. Ok, so there is some risk of fingerprinting, or some obscure self-XSS vulnerability — you may think — Wrong! The security error is pretty much full access to anybody walking by.
The
base idandairtable api keyshould both be secret, since anybody with access to them has the same access as we do and can modify, delete anything we can. The problem: sharing ourbase idandapi keygives full access to anybody with them.
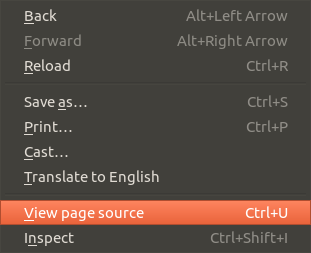
Anybody that can view source can hack us.
This dialog is the only thing between our data and our foes
How to solve it
How to solve it 6, then?
Airtable Roles and permissions
Either read only or modify, delete. Checking Airtable permissions we see that we can use the following roles:
- Owner/Creator
- Editor
- Commenter
- Read-only
Unfortunately, this basically means we can have an api key for a read-only or for total access to the base’s data7.
There have been suggestions to improve the granularity of permissions in Airtable, and I am sure that there will be eventual improvements there.
If you know of an alternative way to have more granular permissions — with different keys with access only to add records, for instance — feel free to contact me
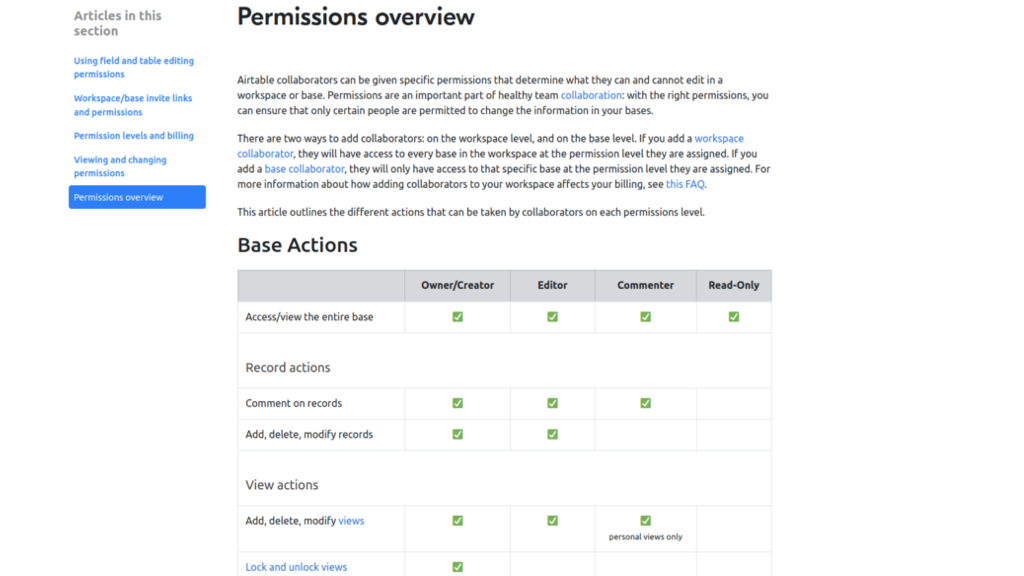
Permissions for base access are often not granular enough for direct api usage
Since we either have a read-only api key — not useful to modify or append — or an (almost) access-to-everything one, we cannot share these api keys.
Using them in our frontdoor code in javascript would allow anybody can get access to the “keys of the kingdom”: our data.
The solution
We need something that limits the actions from airtable Airtable uses the following methods:
-
GETLists information in the table. We do not want to enable this or anybody could list the users that have subscribed to our newsletter. -
POSTCreates new records. This is the only one we want to enable for our mission today. -
PATCHThis is A PATCH request will only update the fields you specify, leaving the rest as they were. -
PUTThis is used to update, deleting anything we are not updating. From the Airtable docs:
A PUT request will perform a destructive update and clear all unspecified cell values.
Usually this is not what we want, PATCH is recommended instead.
HEAD,OPTIONS,TRACE,CONNECTThese are other http verbs that are not used by the rest api generated by Airtable.
There are several Http method, we will allow only
POSTThis way record listing, modification, deletion and table operations become impossible
We need to
- limit the accepted http verbs/methods to only
POST - Hide the name of base and api key
Proxying the requests
Here are the steps to proxy the requests:
- We are going to send the requests to a server —not to airtable —.
- That server will query Airtable in the following way:
- Only the
POSTmethod will be allowed — thus, only appending records. base idandapi keywill be secret, since the server’s source code is not public.- We will use these values to make a request to Airtable’s api and return to the user.
- Only the
Option 1: Serverless proxyiing
(Or similar) Here one option is to contract a new Serverless service, like Cloudfare workers, lambda, or similar. This service can spin up a new function/server/endpoint on every request and redirect it to airtable.
It could be done, for let’s say an estimated 5$/month — since it is a service, it costs money. It is a very valid option that we might explore, but for this newsletter subscription widget, I have decided it is not worth the hassle. I will put it on an existing server instead.
If you are interested in this let me know and I will look into updating the article with this option
Option 2: own server, with django
Since I have already some servers I can use one of them to take part of the proxying to Airtable. A lot of my projects use Django 8, so we will use that. The solution will be very similar in other Python frameworks — flask, bottle — and other programming languages and frameworks — Go, rails. Anything that runs on the server-side really.
First we create an endpoint to accept requests. In this case it is '^/api/newsletter/$'.
This means, if our server is at https://example.com, this will point at https://example.com/api/newsletter/
That is the url our javascript will need to call with the email.
# urls.py
# ...
url(r'^/api/newsletter/$',
    # replace yourapp with the name of your app
    yourapp.AirtableProxy.as_view(airtable_method='POST',
                                  airtable_base='YOUR_BASE_ID',
                                  airtable_table='email_subscribers'),
    name='airtable_proxy'),
# ...
The url we will accept and the view it will use
Next, we create the view that we chose above
# views.py
from django.views.decorators.csrf import csrf_exempt
from django.http import JsonResponse
import requests
from django.utils.decorators import method_decorator
from django.views import View

@method_decorator(csrf_exempt, name='dispatch')
class AirtableProxy(View):
    airtable_base = 'YOUR_BASE_ID'
    # the name of your table
    airtable_table = 'email_subscribers'
    headers = {
        "Authorization": 'Bearer YOUR_API_KEY',
        "Content-Type": 'application/json'
    }

    @csrf_exempt
    def post(self, request):
        url = 'https://api.airtable.com/v0/{base}/{table}'.format(
            base=self.airtable_base,
            table=self.airtable_table,
        )

        if request.method == self.airtable_method:
            email = request.POST.get('email', '')
            if email != '':
                data = {'fields': {'email': email}, 'typecast': True}
                r = requests.post(url, json=data, headers=self.headers)
                return JsonResponse({'ok': 1})
        return JsonResponse({'ko': 1})
View class in your view file views.py
- We need to replace the values in
airtable_base = 'YOUR_BASE_ID'with our base’s id. You can find it in the url of the generatd rest api, or in any of the example calls:
https://airtable.com/YOUR_BASE_ID/api/docs#curl/table:email_subscribers:create
- We will also need to set the name of our base (table) here.
We chose
email_subscribersfor ours, as we saw before.
# the name of your table
airtable_table = 'email_subscribers'- Finally, we replace the
api keyfor our secret api key:
headers = {
"Authorization": 'Bearer YOUR_API_KEY',
"Content-Type": 'application/json'
}
You can get the api key in https://airtable.com/account
Clicking on the asterisks shows the key
Please remember, anybody with this key can take full control of your tables and data in Airtable. Do not put it in your client’s javascript!
- If the server is running in a different domain, we need to add the
csrf_exemptannotation of the view’s method. For example, your site is hosted at https://mejuto.co and the server serving the django requests is not under this domain. In my case, it is athttps://findthepodcast.com, so you will see my requests will point tohttps://findthepodcast.com/api/mejutoco/newsletter/
Modified frontend (secure)
Now, that we have a backend proxying our requests to Airtable, we only need to modify or client code to call that.
<!--
    if using jekyll, indents wrap html into pre tag
    so dont indent html
-->
<script type="text/javascript" src="/assets/js/jquery-3.5.0.min.js"></script>

<div class="subscribe-to-newsletter">
<div class="top">
<h3 class="title">Receive new articles in your inbox</h3>
<h4 class="subtitle">Never more than once a week</h4>
</div>
<div class="bottom">
<div class="before">
<div class="input">
<input type="email" placeholder="name@domain.com" value=""/>
</div>
<div class="button">
<button>Subscribe</button>
</div>
<div class="disclaimer">
<small>I will not share your email with third-parties</small>
</div>
</div>
<div class="after hidden">
<div class="input-cont">
<p class="input">Thank you for subscribing!</p>
</div>
</div>
</div>
</div>

<script type="text/javascript">
    $(document).ready(function () {
        $('.subscribe-to-newsletter button').bind('click', function () {
            const cont = $(this).closest('.subscribe-to-newsletter');
            const emailVal = $(cont).find('.input input').val();
            console.log("click", emailVal);

            if (emailVal.indexOf('@') !== -1) {
                //const data = {fields: {email: emailVal}, typecast: true};
                const data = {email: emailVal};
                $.ajax({
                    url: 'https://findthepodcast.com/api/mejutoco/newsletter/',
                    //url: 'http://127.0.0.1:8000/findthepodcast/api/mejutoco/newsletter/',
                    type: 'post',
                    //data: JSON.stringify(data),
                    data: data,
                    headers: {},
                    dataType: 'json',
                    success: function (data) {
                        $(cont).find('.before').addClass('hidden');
                        $(cont).find('.after').removeClass('hidden');
                    },
                    error: function (data) {
                        // TODO: it should not error if it is ok
                        $(cont).find('.before').addClass('hidden');
                        $(cont).find('.after').removeClass('hidden');
                    }
                });
            }
        });
    });
</script>
Html and javascript in subscribe_to_newsletter.html
Demo
Here is the final result
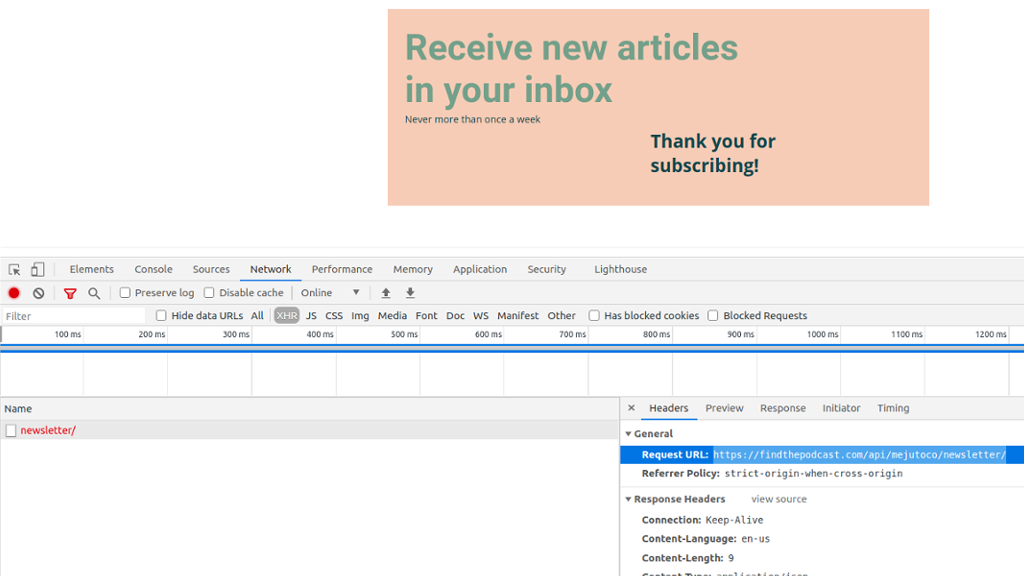
Network tab
We can use our browsers Network Tab in the developer tools (F12 or right-click inspect) to verify that we are not leaking any of:
- Name of
base id - secret
api key
Checking the url
We can confirm that the url (highlighted in the screenshot) contains no base id or api key.
the url that we call
Checking the request parameters
Also, the only parameter sent is the email of the subscriber (highlighted in the screenshot below)
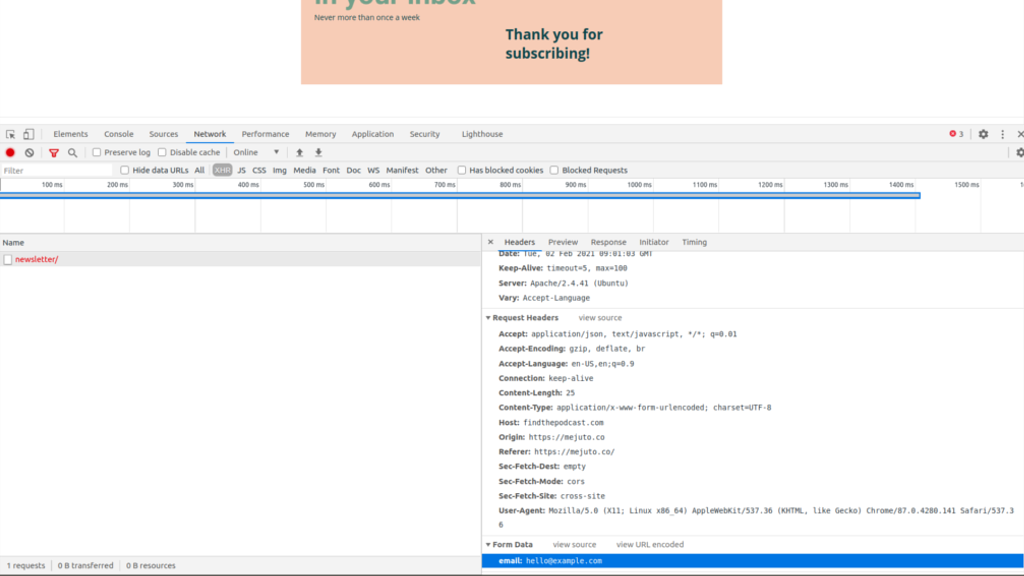
We only send the email to add it to our subscribers
None of the client code has access to our secret information. Confirmed!
Cherry on top: email notification
Once we use Airtable we have a lot of Automations available.
A useful one is to enable email notifying us when we get a new subscriber (when a new record gets added to our base).
Instead of checking Airtable’s base once a week, we can get an instant mood boost as soon as someone subscribes.
On our base view, we can open the Automations panel and add one to send an email. As a trigger we select When a record is created As a Table 9
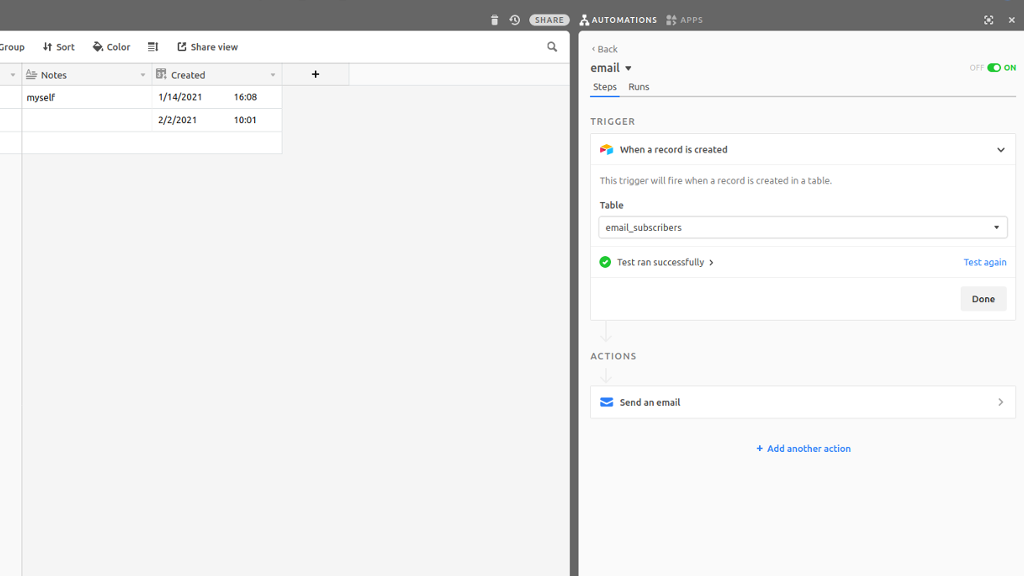
When a user subscribes, we will receive an email
Other uses
We can use the same approach to build any dynamic behaviour like:
- A poll to our audience
- Any kind of form asking for input (Submitting images, documents, text)
- Managing attendance, supplies, calendars.
- As a readonly api to show data managed in Airtable.
Although, we did not show it, we can allow only the
GEThttp method to get readonly access. This can allow us to manage content in Airtable, while using a frontend technology — like React, for instance — to query these endpoints and display the information.
For example, a restaurants website could be developed in React, and perform
GETrequests to our proxy, while the menu is managed on Airtable and can be changed every day, without code. 10
Limitations
We have created a quick newsletter signup to our static site generator using Airtable. Anybody can append more records to the table, but they cannot modify existing records, read them or delete this one or other tables.
Thanks for reading
-
Of course, it is in Airtable’s servers, but as far as we are concerned it is stored somewhere we do not have to care about. ↩
-
Create Read Update Delete ↩
-
Other ways to generate RESTful api’s — sometimes Graphql too — are Hasura and Postgrest ↩
-
Minimum Viable Product, one of the many Enterpreneur’s obsessions. ↩
-
Static Site Generator: a program that takes certain content — usually Markdown — and outputs static html. The html can then be easily served. Pros: scalability, simplicity. Cons: dynamic behaviour is limited to
javascriptor needs third-party services (another server). ↩ -
How to solve it. Great book on problem solving, by George Pólya (still a maths book; not a page turner) Always open to good books recommendations. ↩
-
My personal impression is it looks like Airtable is focused more on offering a no-code tool for collaborators — as we see from the roles Owner, Editor, Commenter — more than for the use case I have in mind for this article, which is to build a programmatic api to use from the frontend. Maybe through the views functionality, something similar could be added. ↩
-
As you probably know, Django is one of the main Python frameworks It is named after the great Jazz guitarrist Django Reinhardt. ↩
-
Table or base, please make up your mind. With love. ↩
-
This use case is covered by Airtable. On a paid plan we can have several roles and a role can be read-only, which is exactly this. For more granularity, a proxy would still be necessary. See more at Roles and Permissions ↩